Angular Setup
Send push notifications to your Angular web app with Pushy.
Note: At any time, you may refer to our Angular.js demo project for a working demo. Also, please make sure to follow our Ionic guide instead, if you're developing with Ionic.
Create an App
Sign up for Pushy Trial to get started, or log in to your existing account
Note: No credit card needed. Upgrade to the Pro plan when you're ready by visiting the Billing page.
Create an app and fill in the Web Push Hostname:
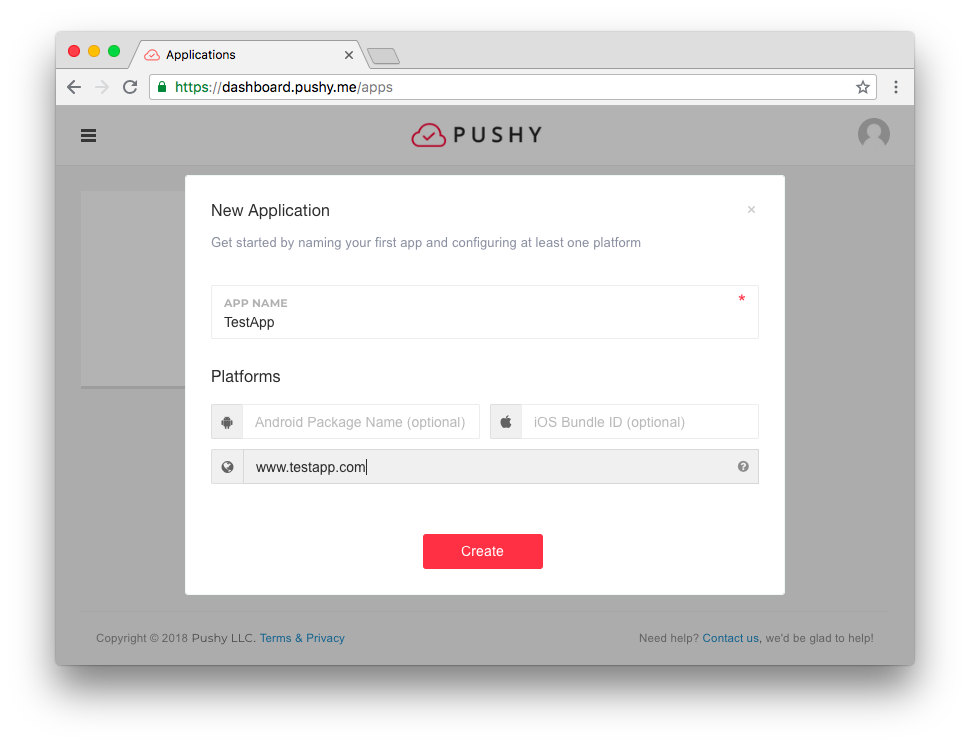
Note: If you have already created an app in the Pushy Dashboard for another platform, simply configure your existing dashboard app with your Web Push Hostname in the App Settings tab and proceed to the next step.
If you're targeting other platforms, please fill in their respective app identifier fields.
Click Create and proceed to the next step.
Enable PWA Support
If you haven't already, enable PWA support for your app by running the following:
ng add @angular/pwaGet the SDK
Install version 1.0.24 of the Pushy Web SDK from npm using the following command:
npm install pushy-sdk-web babel-polyfill --saveNote: The Pushy Web SDK currently depends on babel-polyfill for ES6 generator support.
Create Service Worker
Create a file src/service-worker.js with the following contents:
// Pushy Service Worker
importScripts('https://sdk.pushy.me/web/1.0.24/pushy-service-worker.js');

// Angular PWA Service Worker
importScripts('./ngsw-worker.js');
Again, edit angular.json and add src/service-worker.js to the list of imported assets for your project, under projects.*.architect.build.options.assets:
"assets": ["src/service-worker.js"]
Modify src/app/app.module.ts, replacing ngsw-worker.js with service-worker.js in the following line:
ServiceWorkerModule.register('ngsw-worker.js', { enabled: environment.production })After modification, the line should read:
ServiceWorkerModule.register('service-worker.js', { enabled: environment.production })Register Devices
Users need to be uniquely identified to receive push notifications.
Every user is assigned a unique device token that you can use to push it at any given time. Once the user has been assigned a device token, it should be stored in your application's backend database.
Add the following declaration to the top of the desired component file, such as src/app/app.component.ts, right after the import statements:
import 'babel-polyfill';
import Pushy from 'pushy-sdk-web';
Add the following code inside the Component class, possibly in ngOnInit(), to register the visitor's browser for push notifications:
ngOnInit() {
    // Register visitor to receive push notifications
    Pushy.register({ appId: 'YOUR_APP_ID' }).then(function (deviceToken) {
        // Print device token to console
        alert('Pushy device token: ' + deviceToken);

        // Send the token to your backend server via an HTTP GET request
        // fetch('https://your.api.hostname/register/device?token=' + deviceToken);

        // Succeeded, optionally do something to alert the user
    }).catch(function (err) {
        // Notify user of failure
        alert('Registration failed: ' + err.message);
    });
}
Please make sure to populate the appId variable with your Pushy App ID (Pushy Dashboard -> Click your app -> App Settings -> App ID).
Note: Registration will fail if the user declines the Web Push permission dialog, in which case notification preferences for your hostname must be cleared in the browser settings for the dialog to be displayed again:
- Firefox: Enter
about:preferences#contentin the address bar - Chrome: Enter
chrome://settings/content/notificationsin the address bar
Build Your App for Prod
At this time, it is not possible to test service worker functionality for your Angular app in ng serve development mode due to Angular platform restrictions. Please build your app for prod and test integration by running:
ng build --prod && npx http-server dist/*/ -oAfter clicking Allow in the notification permission dialog, check the DevTools console for the following log indicating successful integration:
Pushy device token: d5c5020f8174f00c59928dBack to Web Push Docs
Continue following the integration instructions in our Web Push docs: