macOS Setup
Send push notifications to your macOS app with Pushy.
Create an App
Sign up for Pushy Trial to get started, or log in to your existing account
Note: No credit card needed. Upgrade to the Pro plan when you're ready by visiting the Billing page.
Create an app and fill in the Web Push Hostname with your company domain name:
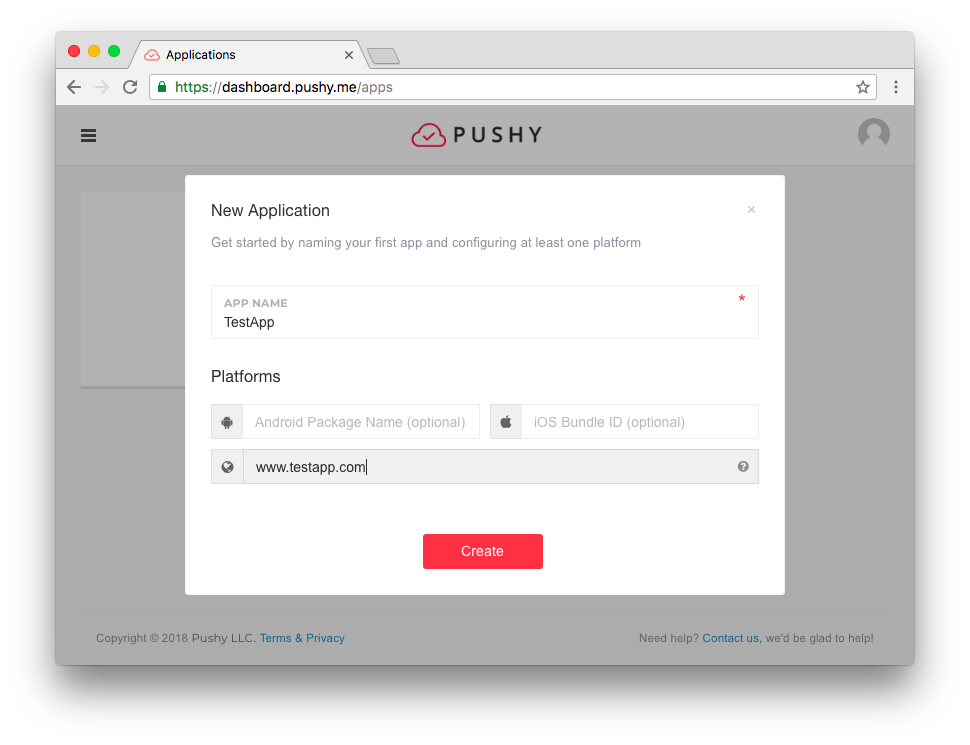
Note: If you have already created an app in the Pushy Dashboard for another platform, simply configure your existing dashboard app with your Web Push Hostname with your company domain name in the App Settings tab and proceed to the next step.
If you're targeting other platforms, please fill in their respective app identifier fields.
Click Create and proceed to the next step.
Get the SDK
You can either install the SDK using the Swift Package Manager, Cocoapods, or directly from source.
Swift Package Manager
In Xcode, go to File -> Add Package Dependencies and paste the following URL into the "Search or Enter Package URL":
https://github.com/pushy/pushy-sdk-macosClick Add Package to install the package.
CocoaPods
Skip to the next section if your project has already been configured to use CocoaPods.
Run the following terminal command to install CocoaPods, the popular Cocoa dependency manager:
sudo gem install cocoapodsRun the following terminal command in the same directory as your
.xcodeproj file to configure your project with a default
Podfile, so you can install pods:
pod init
Import version 1.0.6 of the SDK by adding the
following statement to your project's Podfile within the
target declaration:
pod 'PushyMacOS', '1.0.6'Save the file and run the following command to install the SDK:
pod install
Close all open Xcode windows. From now on, open your project using the
.xcworkspace file instead of the .xcodeproj for
CocoaPods integration to work.
Install from Source
If you prefer not to use CocoaPods or the Swift Package Manager, you can instead download the latest SDK source code and include it in your project. Once you are done, continue to the next step.
Enable Outgoing Connections (App Sandbox)
Note: If your macOS app does not make use of the App Sandbox capability, you may skip this step.
Simply go to the project editor for your target, select the Signing &
Capabilities tab, and under App Sandbox ensure that
Outgoing Connections (Client) is checked.
Register Devices
Users need to be uniquely identified to receive push notifications.
Every user is assigned a unique device token that you can use to push it at any given time. Once the user has been assigned a device token, it should be stored in your application's backend database.
Import the Pushy SDK by adding the following to the top
of one of your .swift files:
import PushyMacOS
import UserNotifications
Note: If you are not using Cocoapods (i.e. manual linking),
please use import PushySDK instead.
Register users by initializing the SDK and calling
pushy.register():
// Initialize Pushy SDK
let pushy = Pushy(NSApplication.shared)

// Replace with your Pushy App ID
pushy.setAppId("YOUR_APP_ID")

// Register the user for push notifications
pushy.register({ (error, deviceToken) in
    // Handle registration errors
    if error != nil {
        return print ("Registration failed: \(error!.localizedDescription)")
    }

    // Print device token to console
    print("Pushy device token: \(deviceToken)")

    // Persist the token locally and send it to your backend later
    UserDefaults.standard.set(deviceToken, forKey: "pushyToken")
})
Note: Please make sure to replace YOUR_APP_ID with
your Pushy App ID in the Pushy
Dashboard -> Click your app -> App Settings -> App ID.
Listen for Notifications
Add the following code after pushy.register() to handle incoming push notifications:
// Handle incoming notifications
pushy.setNotificationHandler({ (data) in
    // Print notification payload
    print("Received notification: \(data)")

    // Create a content object
    let content = UNMutableNotificationContent()

    // Set title if passed in
    if let title = data["title"] as? String {
        content.title = title
    }

    // Set message if passed in
    if let message = data["message"] as? String {
        content.body = message
    }

    // Set badge if passed in
    if let badge = data["badge"] as? Int {
        content.badge = NSNumber(value: badge)
    }

    // Set default sound
    content.sound = .default

    // Pass payload in user info (to pass it onto notification click handler)
    content.userInfo = data

    // Display the notification in the macOS notification center
    UNUserNotificationCenter.current().add(UNNotificationRequest(identifier: UUID().uuidString, content: content, trigger: nil)) { error in
        // Log errors to console
        if let error = error {
            print("Error posting local notification: \(error)")
        }
    }

    // Show an alert dialog
    let alert: NSAlert = NSAlert()
    alert.messageText = "Incoming Notification"
    alert.informativeText = data["message"] as! String
    alert.alertStyle = .informational
    alert.addButton(withTitle: "OK")
    alert.runModal()
})
Listen for Notification Click
Optionally add the following code after
pushy.setNotificationHandler() to listen for when users
tap your notifications in the macOS notification center:
// Handle notification tap event
pushy.setNotificationClickListener({ (data) in
    // Show an alert dialog
    let alert: NSAlert = NSAlert()
    alert.messageText = "Notification Click"
    alert.informativeText = data["message"] as! String
    alert.alertStyle = .informational
    alert.addButton(withTitle: "OK")
    alert.runModal()

    // Navigate the user to another page or
    // execute other logic on notification click
})
Parse Notification Data
Any payload data that you send with your push notifications
is made available to your app via the data parameter of the
setNotificationHandler callback.
If you were to send a push notification with the following
data payload:
{"badge": 1, "title": "New Notification", "message": "Hello World!"}Then you'd be able to retrieve these values in your
setNotificationHandler callback like so:
// Safely unwrap "badge" parameter (Int)
if let badge = data["badge"] as? Int {
    print("badge: \(badge)")
}

// Safely unwrap "title" parameter (String)
if let title = data["title"] as? String {
    print("title: \(title)")
}

// Safely unwrap "message" parameter (String)
if let message = data["message"] as? String {
    print("message: \(message)")
}
Subscribe to Topics
Optionally subscribe the user to one or more topics to target multiple users with a shared interest when sending notifications.
Depending on your app's notification criteria, you may be able to leverage topics to simply the process of sending the same notification to multiple users. If your app only sends personalized notifications, skip this step and simply target individual users by their unique device tokens.
Simply add the following code inside your pushy.register()
callback method to subscribe the user to a topic:
// Subscribe the user to a topic
pushy.subscribe(topic: "news", handler: { (error) in
    // Handle errors
    if error != nil {
        return print("Subscribe failed: \(error!.localizedDescription)")
    }

    // Subscribe successful
    print("Subscribed to topic successfully")
})
Note: Replace news with your own case-sensitive
topic name that matches the following regular expression:
[a-zA-Z0-9-_.]{1,100}. You may also pass in a string array with
multiple topics.
You can then notify multiple users subscribed to a certain topic by
specifying the topic name (prefixed with /topics/) as the
to parameter in the Send
Notifications API.
Run App
Run your macOS app and grant it notification permissions by clicking Options -> Allow in the modal displayed in the top right corner:
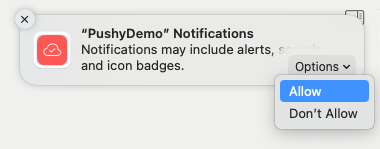
Note: Even if your users do not explicitly allow your app the notification permission, your app can still register for and receive notifications, it just won't be able to display them in the macOS notification center.
Additional Note: You can manually guide your users to enable notifications by visiting the System Preferences app -> Notifications & Focus -> Find "YourAppName" -> toggling "Allow Notifications" on.
Send Test Notification
Copy and paste the generated device token from the Xcode console, and select your app to send a test push notification:
Note: You can specify a topic instead of a device token (i.e. /topics/news). Also, if your app is not automatically detected, please manually copy the Secret API Key from the Dashboard and paste it into the form.
Did you receive the notification? If not, reach out, we'll be glad to help.
Congratulations on implementing Pushy in your macOS app!
To start sending push notifications to your users, start persisting device tokens in your backend, and invoke the Send Notifications API when you want to send a notification. Follow our step-by-step guide: